Introduction
So, you want to publish your first reusable Polymer element? Fantastic! This guide walks you through the process.
When you're done, you'll have:
- A local git repo for your element, based on the official boilerplate.
- A published, Bower-installable version of your element on GitHub.
- Documentation and a running demo of your element hosted on GitHub pages.
Set up
This guide assumes you have Git, Node.js, and Bower installed, and that you have a GitHub account.
Develop
As you develop your new element, make sure that you follow the relative URL conventions for importing other elements into your element project. See HTML imports and dependency management for more information.
A good way to quickly sanity test your component is to access a demo of your
element using Polymer CLI's serve command:
polymer serve
From here you can view your element demo at the following URL:
http://localhost:8080/components/test-element/demo/Where test-element is the name of your element project
directory.
See Run local web server for more help.
Unit tests
Use Polymer CLI's test command to run unit tests against your element.
polymer test
See Run tests for more information.
Documentation
The Polymer CLI element project comes with built-in documentation.
See Document your elements to learn more.
Publish
There are two steps to publishing an element on GitHub:
-
Push your work to a GitHub repo and tag it with a release number, so people can install it using Bower.
In this step you create a master branch containing the bare-minimum of code that needs to be consumed by other apps or elements.
-
Push a
gh-pagesbranch to your repo. This provides live docs and previews of your element via GitHub pages.In this step you create a gh-pages (GitHub pages) branch containing a landing page for your element. This branch contain checked-in dependencies, demos and documentation.
Pushing your element to GitHub
Once you're happy with your element, you’ll want to push the code to GitHub and tag a new version of it.
Click here to create a new repository on GitHub. Try to keep the name of the repository consistent with the naming of your element (e.g if your element is <test-element>, your repository should be called test-element).
Next, follow the steps below (assuming that the name of your element is
test-element):
# Inside your development folder, navigate to your element directory
cd test-element

# Initialize a new Git repository for test-element
git init

# Add the commits for your current code
git add .
git commit -m 'My initial version'

# Add a remote pointing to the GitHub repository you created.
# Replace <username> with your GitHub username.
git remote add origin https://github.com/<username>/test-element.git

# Push your code to master by running
git push -u origin master
Next, you’ll want to tag a version of your element on GitHub. You can either do this directly through the GitHub UI or via the terminal.
Using the terminal
# Once you feel you have a version of your element you can release, tag it
# For example, to tag version 0.0.1
git tag -a v0.0.1 -m '0.0.1'

# Then, push your tag to GitHub
git push --tags
Using the GitHub UI
Navigate to the main GitHub page for your element and click the "releases" link in the main navigation. It is highlighted in red below:

This will navigate you to the Releases page. For a project without any releases, this page will display a message similar to the one below.
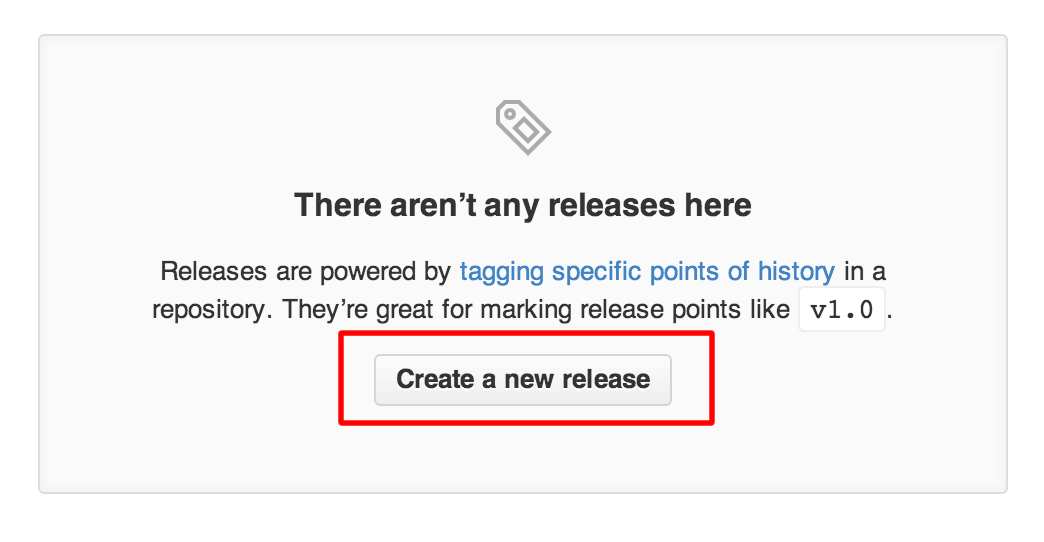
Click the ‘Create a new release’ button to proceed.
This will display a Release drafting page where you can enter in version and release information for your element.
For example, setting v0.0.1 as the tag to create and the master branch as target
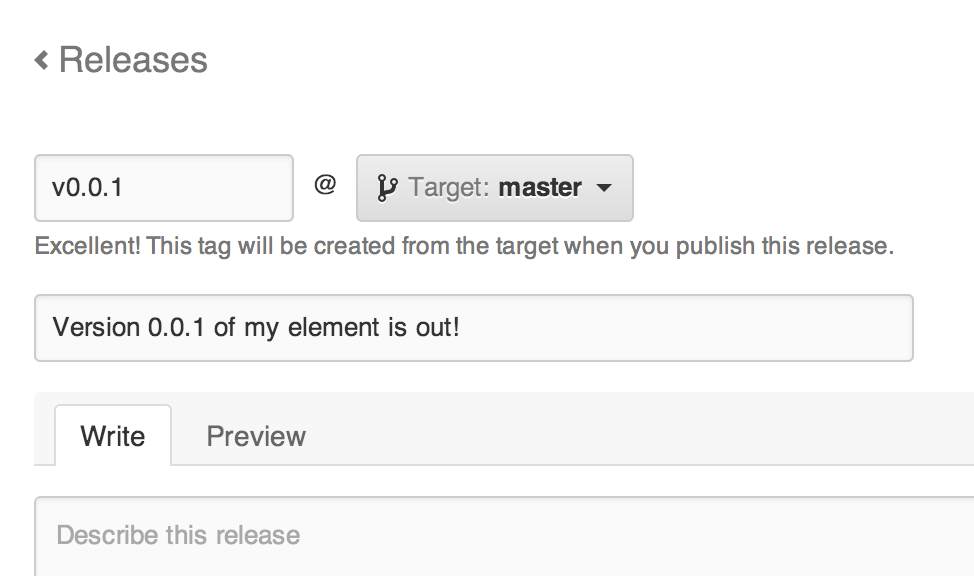
Once you are happy with the information you have entered into the above form, click the ‘Publish release’ button to complete tagging and publishing a release of your element.

Test install your element
You should now be able to install your component. Change to a new directory for testing and run:
# Replace <username> with your GitHub username and <test-element>
# with your repository's name.
bower install <username>/<test-element>
Publishing a demo and landing page for your element
As was mentioned earlier, the Polymer CLI element project template comes with built-in support for creating demos and documentation for your element. This section shows you how to host your demo and documentation on GitHub Pages.
Walk through the commands below to use the Polymer teams gp.sh
script to push a
landing page for your element to GitHub Pages.
Important: Make sure you run the gp.sh script in a temporary directory,
as described below. The script overwrites the contents of the current directory.
In the commands below, replace
# git clone the Polymer tools repository somewhere outside of your
# element project
git clone git://github.com/Polymer/tools.git

# Create a temporary directory for publishing your element and cd into it
mkdir temp && cd temp

# Run the gp.sh script. This will allow you to push a demo-friendly
# version of your page and its dependencies to a GitHub pages branch
# of your repository (gh-pages). Below, we pass in a GitHub username
# and the repo name for our element
../tools/bin/gp.sh <username> <test-element>

# Finally, clean-up your temporary directory as you no longer require it
cd ..
rm -rf temp
This will create a new gh-pages branch (or clone and clear the current one) then
push a shareable version of your element to it. To see your newly-published docs,
point a browser at:
http://<username>.github.io/<test-element>/
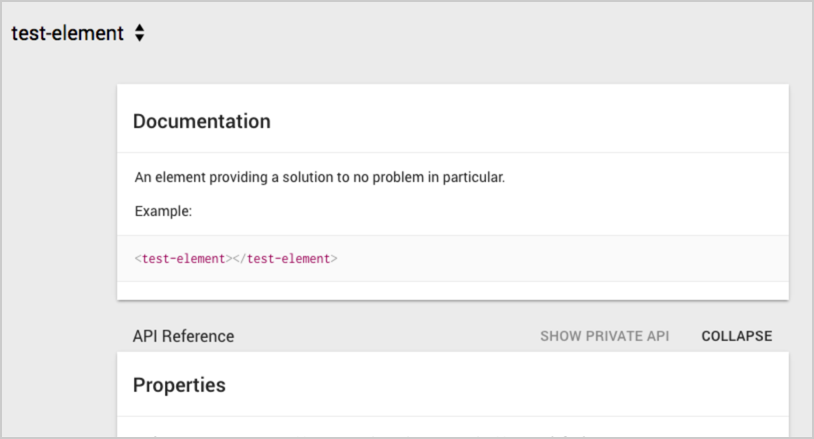
Share
You can now share the link to your element hosted on GitHub pages with the world. The Polymer CLI element project gives you a styled documentation page that looks similar to the screenshot below: